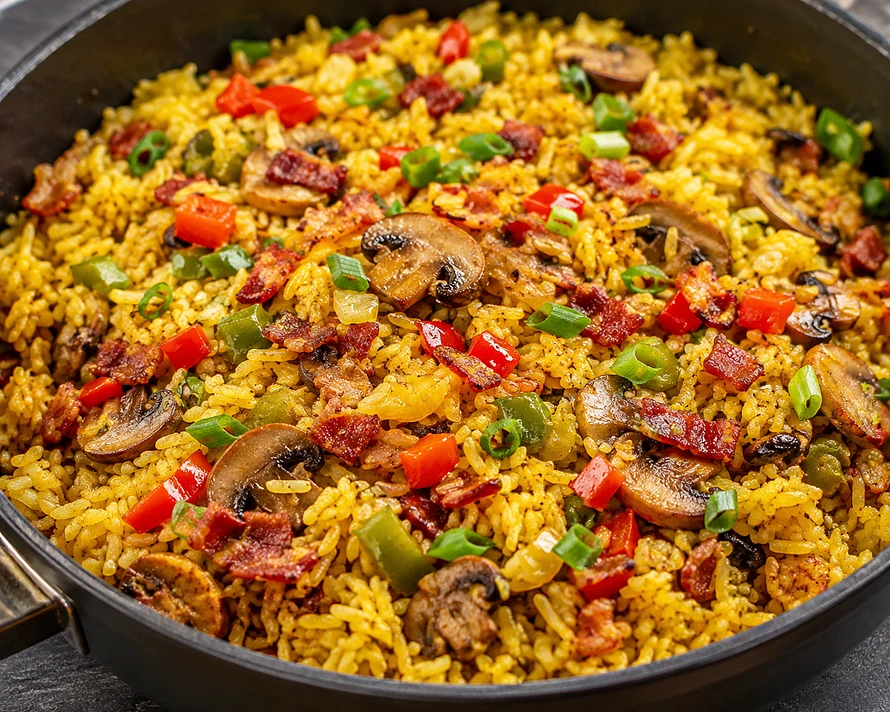
Golden, Savory, Smoky & Absolutely Delicious!

Whether you're preparing a flavorful weeknight side dish or serving a crowd, this Amazing Bacon, Mushroom & Turmeric Rice delivers perfectly seasoned, fluffy rice packed with crispy bacon, tender baby bella mushrooms, colorful peppers, onions, garlic, and aromatic turmeric. Cooking the rice in chicken stock adds an extra layer of savory flavor, while the rendered bacon fat helps create an incredibly rich and satisfying dish.

Recipe Overview

Prep Time: 15 minutes
Cook Time: 30–35 minutes
Resting Time: 10 minutes
Total Time: Approximately 45–50 minutes
Servings: 6–8
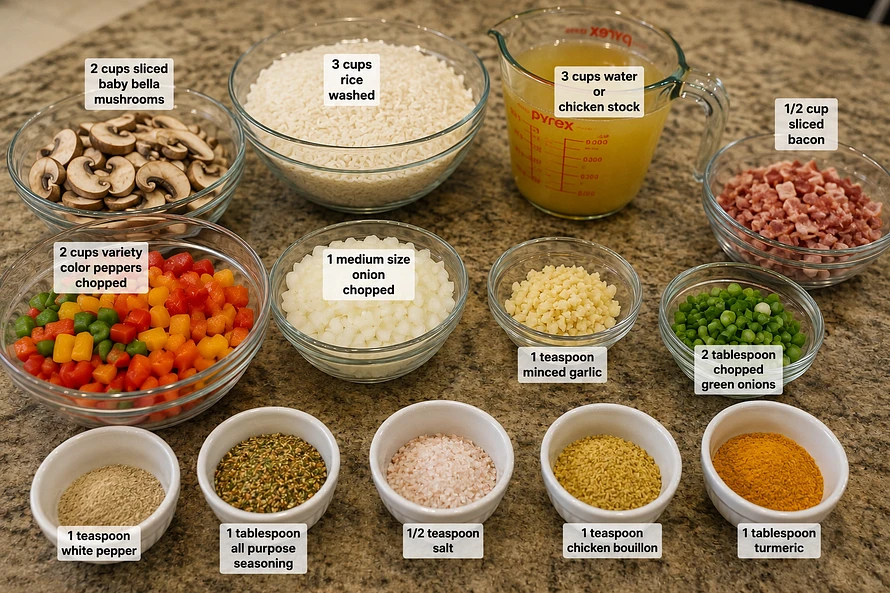
Ingredients

  • 3 cups long-grain white rice, washed and well drained
  • 3 cups water or chicken stock
  • ½ cup bacon, sliced or chopped
  • 2 cups baby bella mushrooms, sliced
  • 2 cups assorted-color bell peppers, chopped
  • 1 medium onion, chopped
  • 1 teaspoon minced garlic
  • 2 tablespoons green onions, chopped
  • 1 tablespoon turmeric
  • 1 teaspoon white pepper
  • 1 tablespoon all-purpose seasoning
  • ½ teaspoon salt
  • 1 teaspoon chicken bouillon
  • 1 tablespoon butter, optional
  • 1 tablespoon cooking oil, only if needed

----

Instructions

Step 1: Wash and Prepare the Rice

Place the rice in a large bowl and rinse under cold water several times until the water runs mostly clear. Drain the rice thoroughly and set aside.

Tip: Properly washing the rice helps remove excess starch and produces fluffier individual grains.

Step 2: Cook the Bacon

Place a large heavy-bottomed pot or Dutch oven over medium heat.

Add the chopped bacon and cook for approximately 5–7 minutes, stirring occasionally, until the bacon is browned and crispy and has rendered its fat.

Remove about half of the crispy bacon with a slotted spoon and set aside for finishing the rice.

Leave approximately 2 tablespoons of bacon fat in the pot.

Step 3: Sauté the Vegetables

Add the chopped onion and bell peppers to the bacon fat.

Sauté for approximately 3–4 minutes, stirring occasionally, until the vegetables begin to soften.

Add the sliced baby bella mushrooms and cook for another 4–5 minutes, allowing the mushrooms to brown slightly and release their moisture.

Add the minced garlic and cook for 30–60 seconds, just until fragrant.

Step 4: Toast the Rice

Add the washed and drained rice directly to the pot with the bacon and vegetables.

Gently stir and toast the rice for approximately 2–3 minutes.

This step allows the rice to absorb the bacon, mushroom, and vegetable flavors before the liquid is added.

Step 5: Season the Rice

Add the:

  • Turmeric
  • White pepper
  • All-purpose seasoning
  • Salt
  • Chicken bouillon

Stir gently until the turmeric evenly coats the rice and the grains take on a beautiful golden-yellow color.

Step 6: Add the Liquid

Pour in 3 cups of chicken stock or water.

Stir once to combine everything.

Bring the mixture to a gentle boil over medium-high heat.

Step 7: Cook the Rice

Once the liquid begins boiling, reduce the heat to low.

Cover the pot tightly with a lid and cook for approximately 18–22 minutes, or until the liquid has been absorbed and the rice is tender.

Do not continually stir the rice while it cooks. Keeping the lid closed allows the steam to properly cook the rice and helps prevent it from becoming sticky.

Step 8: Let the Rice Rest

Turn off the heat and leave the pot covered for 10 minutes.

The trapped steam will finish cooking the rice and help create a fluffy texture.

Step 9: Fluff and Finish

Remove the lid and gently fluff the rice with a fork.

Add the reserved crispy bacon and chopped green onions.

For an extra-rich finish, add 1 tablespoon of butter and gently fold it through the hot rice until melted.

Taste and adjust the seasoning if necessary.

Step 10: Serve

Transfer the rice to a beautiful serving dish and garnish with additional green onions and crispy bacon.

Serve hot as a side dish with roasted chicken, fried chicken, pork, steak, seafood, or your favorite Southern or Cajun-style entrée.

Chef's Tips

Use chicken stock instead of water for a deeper, richer flavor.
Don't skip browning the mushrooms. Allowing them to develop some color adds tremendous savory flavor.
Toast the rice before adding the liquid for better flavor and beautifully separated grains.
Don't over-stir the rice while cooking. Excessive stirring can release starch and make the rice gummy.
Let the rice rest for 10 minutes after cooking. This is one of the secrets to fluffy rice.
Reserve some crispy bacon for the top. Adding it at the end gives you a delicious contrast between the tender rice and crunchy bacon.
For even more flavor, use the rendered bacon fat as the cooking fat for the vegetables and rice.

🌟 Signature Finish

For an especially delicious version, use chicken stock, rendered bacon fat, browned baby bella mushrooms, and a final tablespoon of butter. The turmeric provides the beautiful golden color while the bacon and mushrooms give the rice a rich, savory depth that makes this much more than an ordinary rice side dish.
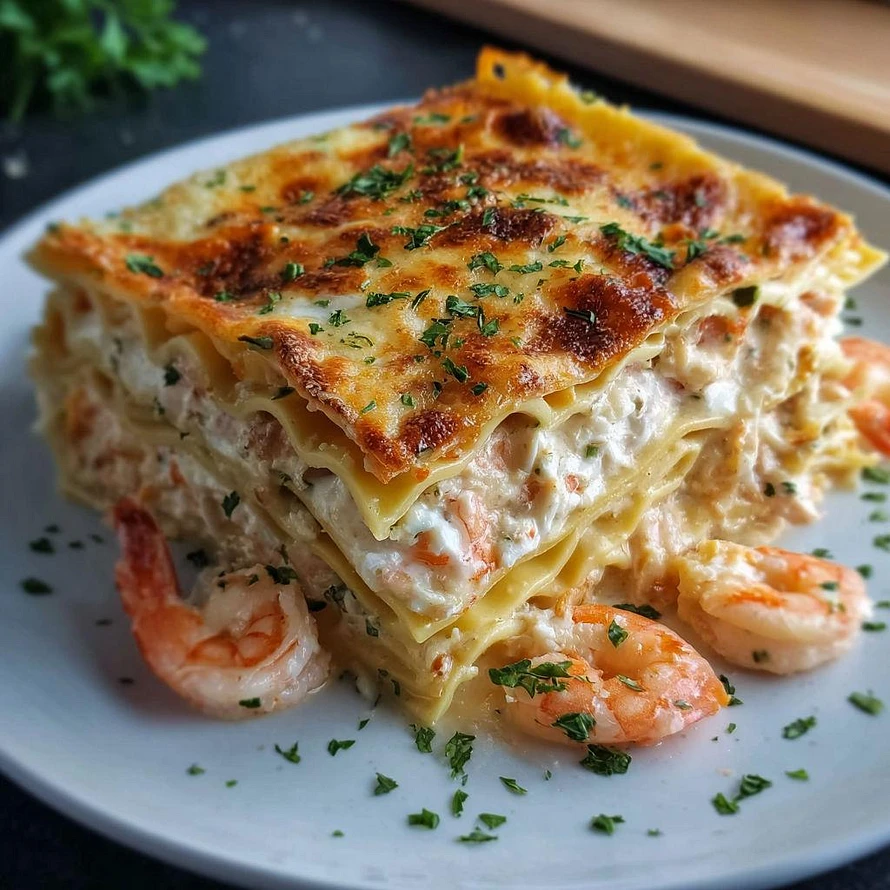
Rich, Creamy, and Loaded with Seafood!

Whether you're preparing a special family dinner or entertaining guests, this Easy Seafood Lasagna with Homemade Béchamel Sauce delivers layers of tender pasta, succulent shrimp, scallops, sweet crab meat, creamy ricotta, and a rich Parmesan béchamel. Finished with bubbling golden cheese, it's an elegant restaurant-quality meal that's surprisingly simple to make.

Recipe Overview

Prep Time: 35 minutes
Cook Time: 50–55 minutes
Rest Time: 15–20 minutes
Total Time: Approximately 1 hour 45 minutes
Servings: 8–10

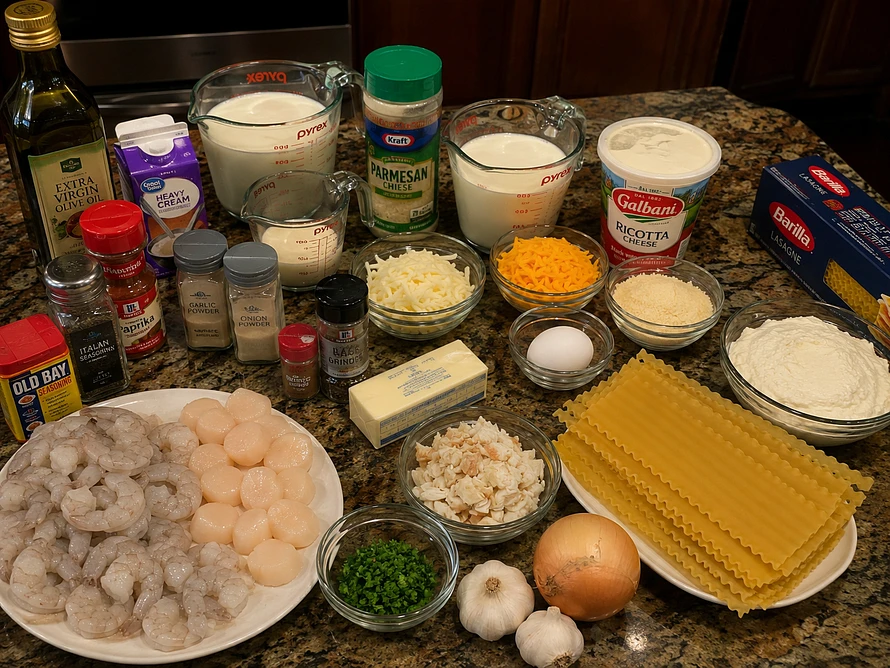
Ingredients

Seafood Filling

  • 1 lb large shrimp, peeled, deveined, and roughly chopped
  • 1 lb bay scallops
  • 8 oz lump crab meat
  • 2 tbsp butter
  • 1 tbsp olive oil
  • 1 small onion, finely diced
  • 4 cloves garlic, minced
  • 1 tsp Italian seasoning
  • ½ tsp paprika
  • ½ tsp Old Bay seasoning
  • Salt and black pepper, to taste
  • 2 tbsp fresh parsley, chopped
  • 2 tbsp fresh lemon juice

Creamy Béchamel Sauce

  • 6 tbsp butter
  • 6 tbsp all-purpose flour
  • 5 cups whole milk, warmed
  • 1 cup heavy cream
  • 1 tsp salt
  • ½ tsp black pepper
  • ¼ tsp white pepper (optional)
  • ¼ tsp ground nutmeg
  • ½ tsp garlic powder
  • ¾ cup freshly grated Parmesan cheese

Cheese Mixture

  • 15 oz whole milk ricotta cheese
  • 1 large egg
  • 2 cups shredded mozzarella cheese
  • ¼ cup shredded sharp cheddar cheese
  • ½ cup grated Parmesan cheese
  • 2 tbsp chopped fresh parsley
  • ½ tsp garlic powder
  • Salt and black pepper, to taste

Additional Ingredients

  • 12 lasagna noodles
  • Extra shredded mozzarella cheese
  • Extra Parmesan cheese
  • Fresh chopped parsley, for garnish

----

Instructions

Step 1: Cook the Lasagna Noodles

Bring a large pot of generously salted water to a boil.

Cook the lasagna noodles according to the package directions until just al dente.

Drain and rinse under cold water.

Lay the noodles flat on parchment paper or lightly brush them with olive oil to prevent sticking.

Step 2: Prepare the Seafood Filling

Heat the butter and olive oil in a large skillet over medium heat.

Add the diced onion and sauté for 3–4 minutes until softened.

Stir in the garlic and cook for another 30 seconds.

Season with the Italian seasoning, paprika, Old Bay, salt, and black pepper.

Add the scallops and cook for 2 minutes.

Add the shrimp and continue cooking for another 2–3 minutes, just until they begin turning pink.

Gently fold in the crab meat.

Stir in the lemon juice and chopped parsley.

Remove from the heat and allow the seafood mixture to cool slightly.

Step 3: Prepare the Béchamel Sauce

In a large saucepan over medium heat, melt the butter.

Whisk in the flour and cook for 2 minutes, stirring constantly to form a smooth roux.

Slowly whisk in the warm milk until smooth.

Add the heavy cream and continue whisking until the sauce begins to thicken.

Season with the salt, black pepper, white pepper, nutmeg, and garlic powder.

Cook for 8–10 minutes, stirring frequently, until the sauce is smooth and creamy.

Remove from the heat and stir in the Parmesan cheese until completely melted.

Step 4: Prepare the Cheese Mixture

In a large bowl combine:

  • Ricotta cheese
  • Egg
  • Mozzarella cheese
  • Sharp cheddar cheese
  • Parmesan cheese
  • Parsley
  • Garlic powder
  • Salt and black pepper

Mix until smooth and well combined.

Step 5: Assemble the Lasagna

Preheat your oven to 375°F (190°C).

Lightly grease a 9×13-inch baking dish.

Spread a thin layer of béchamel sauce over the bottom of the dish.

Layer in the following order:

  • 3 lasagna noodles
  • Half of the ricotta cheese mixture
  • One-third of the seafood mixture
  • Béchamel sauce
  • Mozzarella cheese

Repeat the layers.

Finish with the remaining noodles.

Top with the remaining béchamel sauce, extra mozzarella, and Parmesan cheese.

Step 6: Bake

Cover the baking dish loosely with aluminum foil.

Bake for 35 minutes.

Remove the foil and continue baking for 15–20 minutes, or until the cheese is melted, bubbly, and lightly golden brown.

Step 7: Brown the Top

For a beautifully browned cheesy crust, switch the oven to Broil during the final 2–3 minutes.

Watch carefully to prevent burning.

Step 8: Rest and Serve

Remove the lasagna from the oven and allow it to rest for 15–20 minutes before slicing.

Garnish with freshly chopped parsley and an extra sprinkle of Parmesan cheese.

Serve with garlic bread, a fresh Caesar salad, or roasted vegetables.

Chef's Tips

✔ Warm the milk before adding it to the roux for an extra smooth béchamel.
✔ Pat the shrimp and scallops dry before cooking to prevent excess liquid.
✔ Avoid overcooking the seafood in the skillet—it will finish cooking while baking.
✔ Let the lasagna rest for at least 15 minutes before slicing to help the layers hold together.
✔ Freshly grated Parmesan melts more smoothly than pre-shredded cheese.
✔ For extra richness, sprinkle a little additional cheddar and mozzarella over the top before baking.
✔ This lasagna tastes even better the next day, making it an excellent make-ahead meal.

Tender, Juicy, and Smothered in Savory Mushroom Gravy!

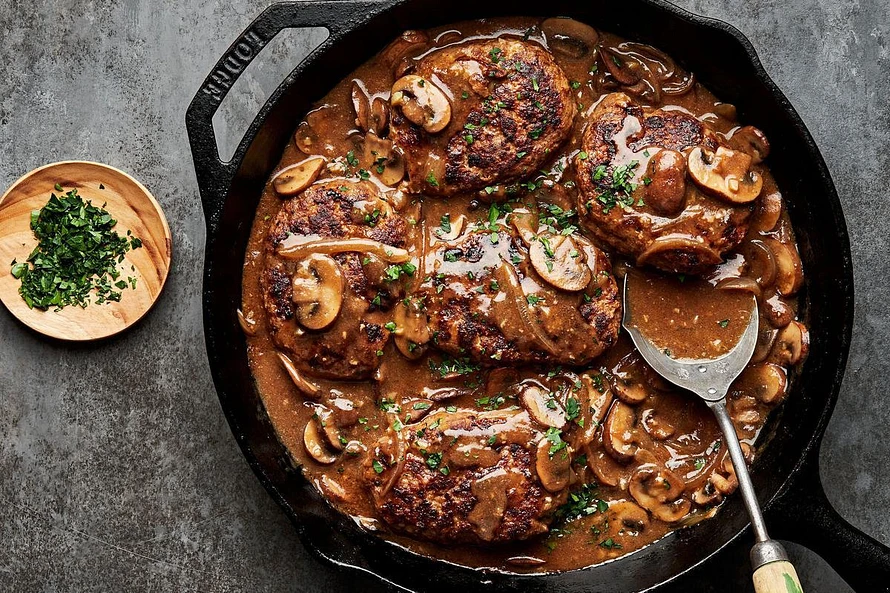
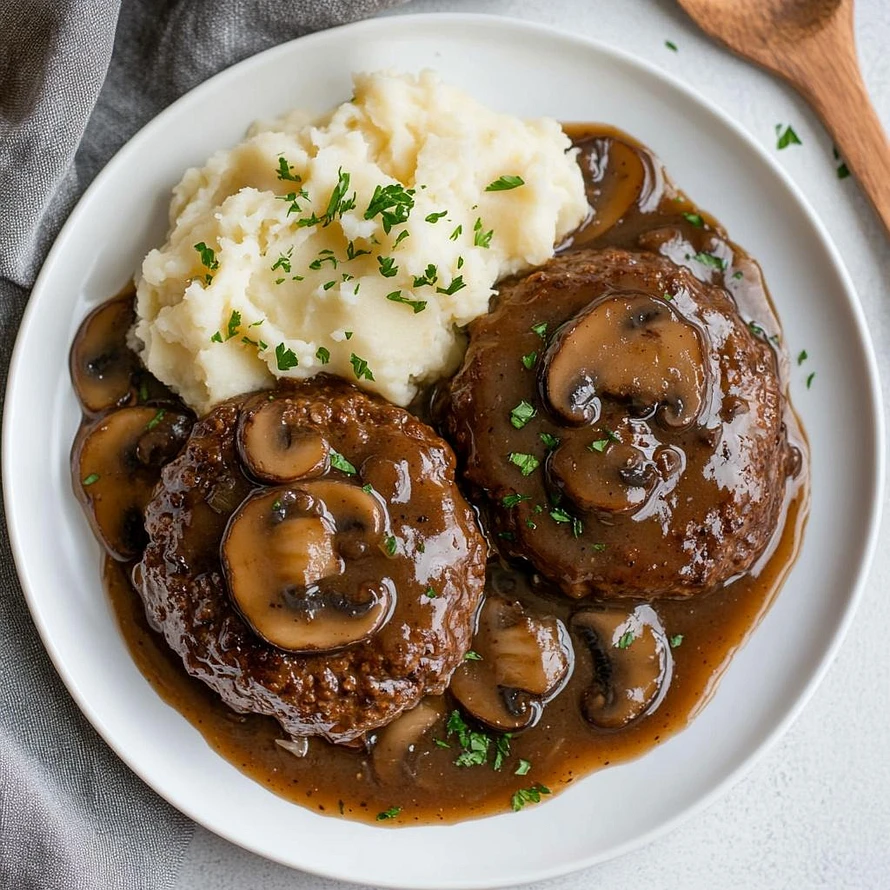
Whether you're preparing a comforting weeknight dinner or serving a hearty family meal, this Salisbury Steak with Mushroom Gravy delivers tender, perfectly seasoned beef patties covered in a rich, savory mushroom-and-onion gravy. The steaks are beautifully browned before being gently simmered in the gravy, creating an incredibly flavorful and satisfying comfort-food classic.

Recipe Overview

Prep Time: 20 minutes
Cook Time: 30 minutes
Total Time: Approximately 50 minutes
Servings: 4–6

Ingredients

For the Salisbury Steaks

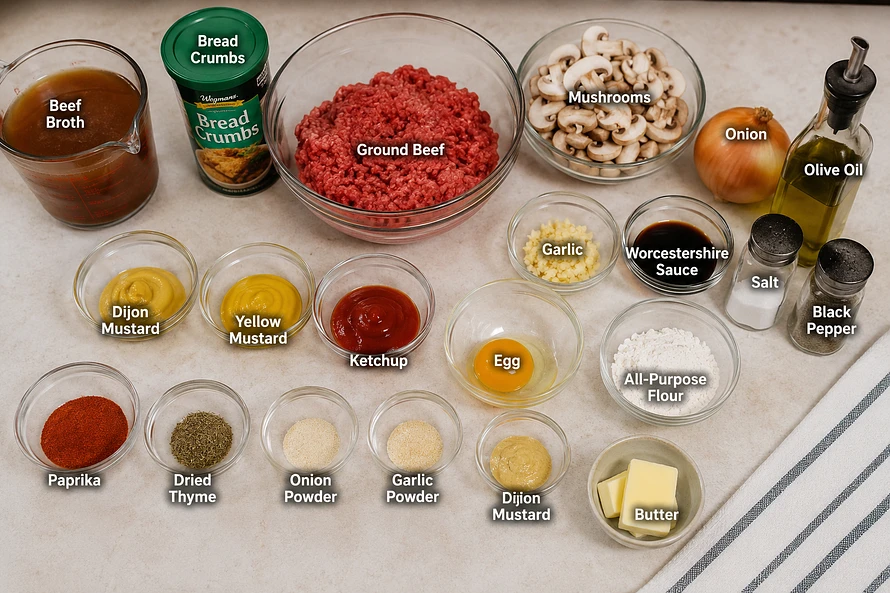
  • 1½ lbs ground beef, preferably 80/20
  • ½ cup breadcrumbs
  • 1 large egg
  • ¼ cup finely diced onion
  • 2 tbsp ketchup
  • 1 tbsp Worcestershire sauce
  • 1 tsp yellow mustard
  • 1 tsp garlic powder
  • 1 tsp onion powder
  • 1 tsp paprika
  • ½ tsp dried thyme
  • ½ tsp salt
  • ½ tsp black pepper
  • 2 tbsp olive oil or vegetable oil, for searing

For the Mushroom Gravy

  • 2 tbsp butter
  • 8 oz mushrooms, sliced
  • 1 medium onion, thinly sliced
  • 2 cloves garlic, minced
  • 2 tbsp all-purpose flour
  • 2½ cups beef broth
  • 1 tbsp Worcestershire sauce
  • 1 tsp Dijon mustard
  • ½ tsp onion powder
  • ½ tsp garlic powder
  • ½ tsp dried thyme
  • ¼ tsp black pepper
  • Salt, to taste
  • 1 tbsp cold butter, to finish
  • 1 tbsp chopped fresh parsley, for garnish

----

Instructions

Step 1: Prepare the Salisbury Steak Mixture

In a large mixing bowl, combine the ground beef, breadcrumbs, egg, finely diced onion, ketchup, Worcestershire sauce, yellow mustard, garlic powder, onion powder, paprika, thyme, salt, and black pepper.

Gently mix until everything is evenly incorporated. Do not overmix, as this can make the steaks tough.

Step 2: Shape the Steaks

Divide the mixture into 4–6 equal portions.

Shape each portion into an oval-shaped patty approximately ½–¾ inch thick.

Make a small indentation in the center of each patty with your thumb. This helps the steaks maintain their shape while cooking.

Step 3: Brown the Steaks

Heat the olive oil in a large skillet over medium-high heat.

Place the Salisbury steaks into the hot skillet without overcrowding.

Sear for approximately 3–4 minutes per side, or until deeply browned.

The steaks do not need to be completely cooked at this stage because they will finish cooking in the gravy.

Remove the steaks from the skillet and set aside.

Step 4: Sauté the Mushrooms and Onions

Reduce the heat to medium.

Add the butter to the same skillet.

Add the sliced mushrooms and onions. Cook for approximately 5–7 minutes, stirring occasionally, until the mushrooms are nicely browned and the onions are softened.

Add the minced garlic and cook for another 30–60 seconds, just until fragrant.

Step 5: Make the Gravy

Sprinkle the flour over the mushrooms and onions.

Stir continuously for approximately 1 minute to cook out the raw flour taste.

Slowly pour in the beef broth while whisking or stirring constantly to prevent lumps.

Add the Worcestershire sauce, Dijon mustard, onion powder, garlic powder, thyme, and black pepper.

Bring the gravy to a gentle simmer.

Cook for approximately 3–5 minutes, stirring occasionally, until the gravy begins to thicken.

Step 6: Return the Steaks to the Gravy

Place the browned Salisbury steaks back into the skillet.

Spoon the mushroom gravy generously over each steak.

Reduce the heat to low, cover the skillet, and simmer for approximately 10–12 minutes.

The steaks should reach an internal temperature of 160°F (71°C).

Step 7: Finish the Gravy

Remove the lid and taste the gravy.

Adjust the seasoning with additional salt and black pepper if needed.

For an extra-rich, silky finish, turn off the heat and stir in 1 tablespoon of cold butter until completely melted and incorporated.

This gives the gravy a beautiful sheen and richer flavor.

Step 8: Rest and Garnish

Allow the Salisbury steaks to rest in the gravy for approximately 5 minutes.

Garnish with freshly chopped parsley.

Serve the steaks generously covered with the mushroom gravy.

Chef's Tips

Don't overmix the beef — gently combine the ingredients for tender steaks.
Brown the steaks well — those browned bits left in the skillet add tremendous flavor to the gravy.
Don't overcrowd the skillet — sear in batches if necessary.
Brown the mushrooms properly — allow them to cook until golden brown rather than simply steaming them.
Use cold butter at the end for a glossy, restaurant-quality gravy.
Dijon mustard adds depth without making the gravy taste strongly of mustard.
Let the steaks simmer in the gravy so they absorb all that rich mushroom and beef flavor.

Perfect Sides

Serve your Salisbury steak with creamy mashed potatoes, buttered egg noodles, white rice, green beans, roasted vegetables, or buttery corn.

Chef's Favorite: Spoon the mushroom gravy over the mashed potatoes as well as the steak—the combination is absolutely irresistible.

Rich, Hearty Comfort Food with a Creamy Béchamel Twist!

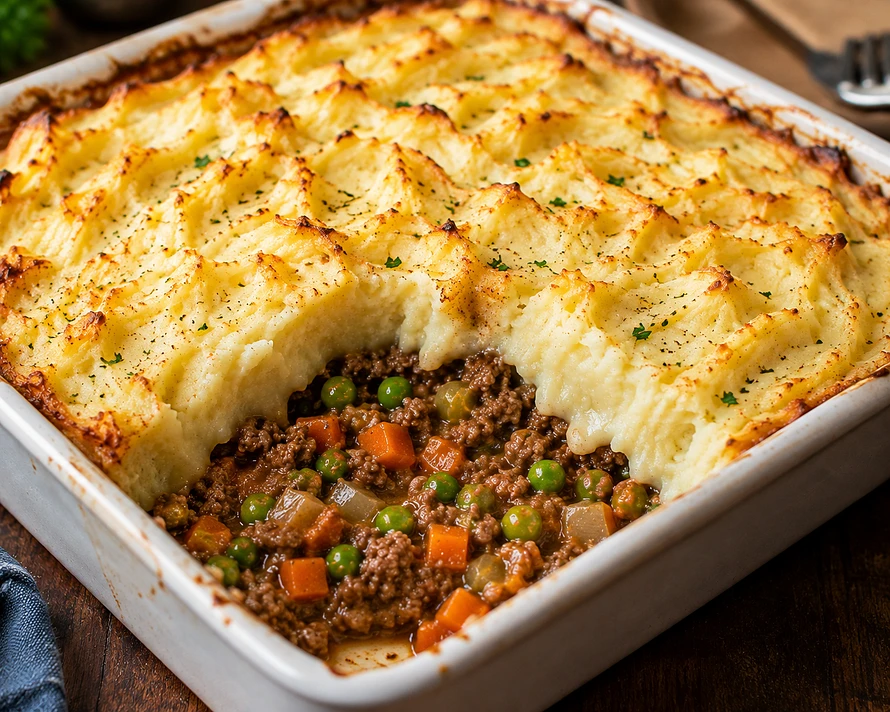
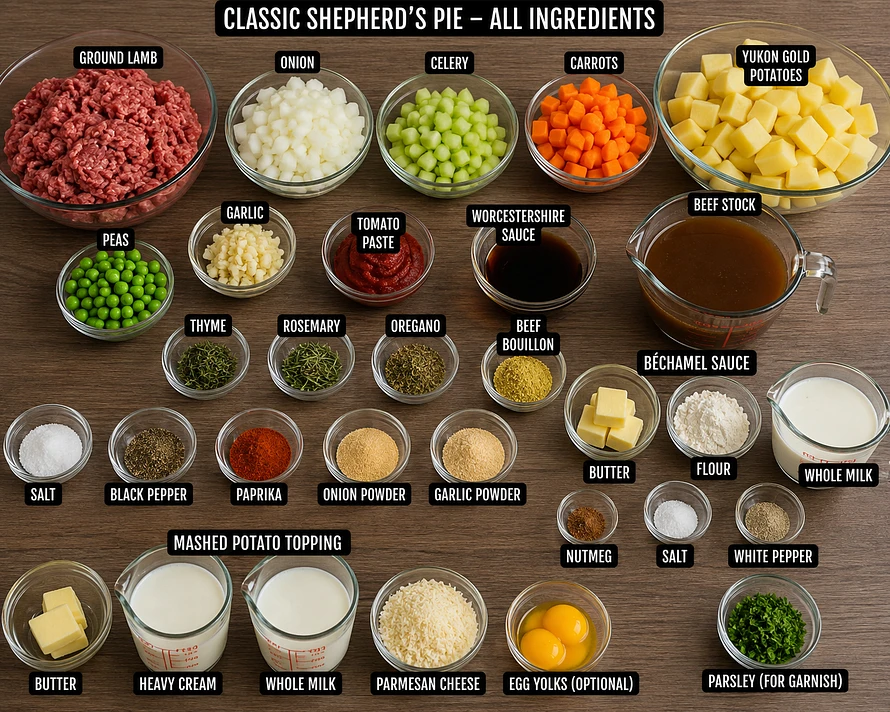
Whether you're preparing a cozy family dinner or serving guests, this Classic Shepherd's Pie is the ultimate comfort food. Tender ground lamb is simmered with onions, celery, carrots, peas, fresh herbs, and a savory beef gravy, then enriched with a touch of silky béchamel for extra creaminess. Finished with buttery Parmesan mashed potatoes and baked until golden brown, every bite is rich, flavorful, and incredibly satisfying.

Recipe Overview

Prep Time: 30 minutes
Cook Time: 50 minutes
Total Time: Approximately 1 hour 20 minutes
Servings: 6–8

Ingredients

For the Meat Filling

  • 2 lbs ground lamb

  • 2 tbsp olive oil

  • 1 large onion, diced

  • 2 celery stalks, diced

  • 2 large carrots, diced

  • 4 cloves garlic, minced

  • 1 cup frozen peas

  • 2 tbsp tomato paste

  • 2 tbsp Worcestershire sauce

  • 1 tsp fresh thyme leaves

  • 1 tsp chopped fresh rosemary

  • 1 tsp dried oregano

  • 1 tsp kosher salt

  • 1 tsp black pepper

  • ½ tsp paprika

  • ½ tsp onion powder

  • ½ tsp garlic powder

  • 1 tsp beef bouillon

  • 1 cup beef stock

Béchamel Sauce

  • 2 tbsp butter

  • 2 tbsp all-purpose flour

  • 1½ cups whole milk, warmed

  • Pinch of nutmeg

  • Salt and white pepper, to taste

Mashed Potato Topping

  • 3 lbs Yukon Gold potatoes, peeled and cubed

  • 6 tbsp butter

  • ½ cup heavy cream

  • ½ cup whole milk

  • ½ cup grated Parmesan cheese

  • Salt and black pepper, to taste

  • 2 egg yolks (optional, for a golden finish)

For Garnish

  • 1 tbsp chopped fresh parsley

Instructions

Step 1: Prepare the Potatoes

Place the potatoes in a large pot of salted cold water and bring to a boil. Cook for 15–18 minutes, or until fork tender. Drain well and mash with the butter, heavy cream, milk, Parmesan cheese, salt, and pepper until smooth and creamy. Stir in the egg yolks if using, then set aside.

Step 2: Make the Béchamel

In a medium saucepan, melt the butter over medium heat. Whisk in the flour and cook for 2 minutes. Gradually whisk in the warmed milk until smooth. Simmer for 3–5 minutes until thickened. Season with nutmeg, salt, and white pepper. Remove from the heat.

Step 3: Prepare the Filling

Heat the olive oil in a large skillet over medium-high heat. Add the onions, celery, and carrots and cook for 6–8 minutes until softened. Stir in the garlic and cook for another minute.

Add the ground lamb and cook until browned, breaking it into small crumbles. Drain any excess fat if necessary.

Stir in the tomato paste and cook for 2 minutes before adding the Worcestershire sauce, thyme, rosemary, oregano, paprika, onion powder, garlic powder, bouillon, salt, and black pepper.

Pour in the beef stock and simmer for 10 minutes until slightly reduced. Stir in the peas, then fold ¾ cup of the prepared béchamel sauce into the meat mixture to create a rich, velvety filling.

Step 4: Assemble

Preheat the oven to 400°F (204°C).

Spread the meat filling evenly into a 9×13-inch baking dish. Spoon the mashed potatoes over the filling and spread evenly to completely cover the meat. Use a fork to create decorative ridges across the top for extra browning.

Step 5: Bake

Bake for 25–30 minutes, or until the filling is bubbling around the edges and the potatoes are lightly golden.

For an extra crispy top, switch the oven to broil during the final 2–3 minutes, watching carefully to prevent burning.

Step 6: Rest and Serve

Remove the Shepherd's Pie from the oven and allow it to rest for 10–15 minutes before serving. Garnish with freshly chopped parsley and enjoy.

Chef's Tips

✔ Authentic Shepherd's Pie is traditionally made with ground lamb. For Cottage Pie, substitute ground beef.
✔ Fold only a small amount of béchamel into the filling to add richness without making it overly creamy.
✔ Yukon Gold potatoes produce the creamiest mashed potato topping.
✔ Create fork ridges across the potatoes to achieve beautiful golden, crispy peaks while baking.
✔ Let the pie rest for at least 10 minutes before serving to help the layers set and make slicing easier.

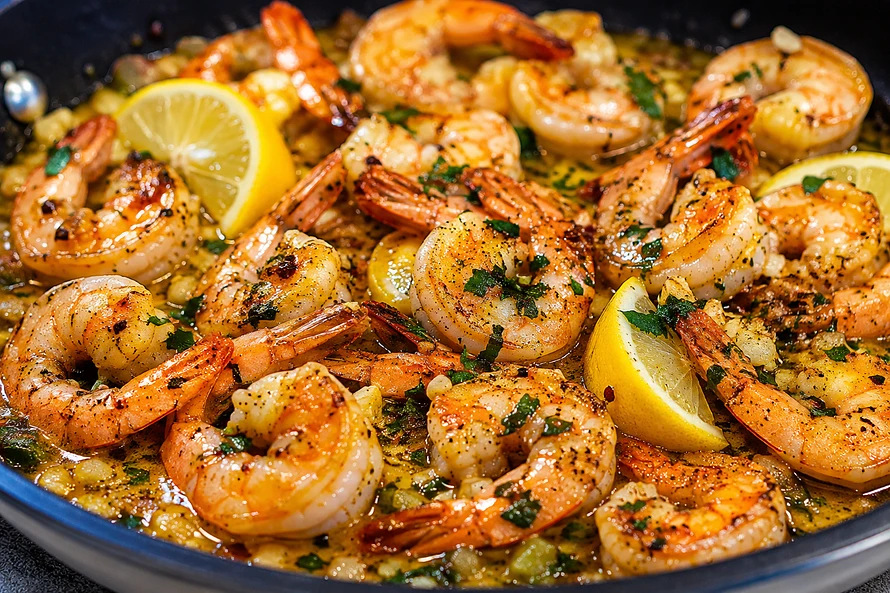
Talk of the Town 30-Minute Butter Shrimp

Buttery, Garlicky, Juicy, and Bursting with Flavor!

Whether you're preparing a quick weeknight dinner or entertaining guests, this Easy Talk of the Town 30-Minute Butter Shrimp delivers succulent shrimp coated in a rich, silky garlic-butter sauce with lemon, herbs, and a touch of white wine. It's incredibly easy to prepare but tastes like something straight from a great seafood restaurant.

Recipe Overview

Prep Time: 10 minutes
Marinating Time: 10 minutes
Cook Time: 15–20 minutes
Total Time: Approximately 30 minutes
Servings: 4–6

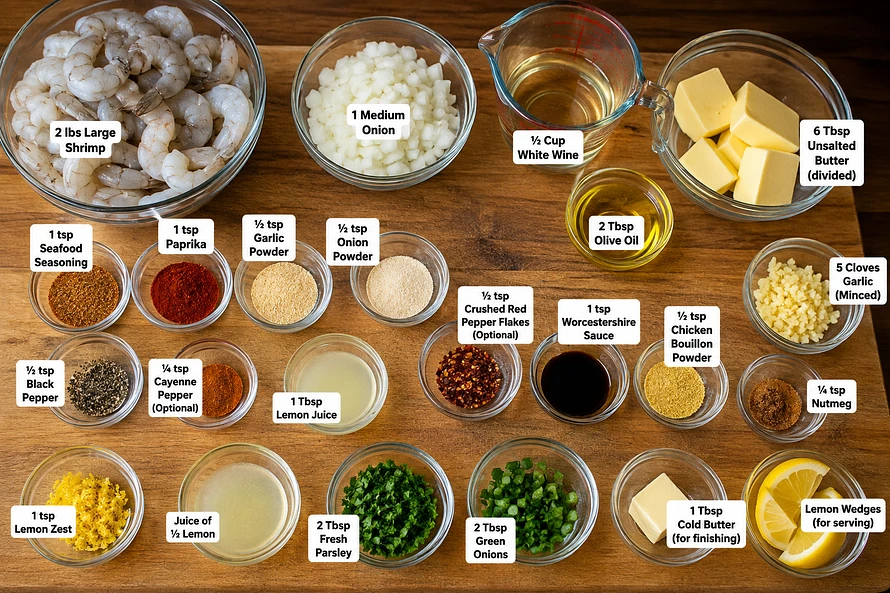
Ingredients

Shrimp

  • 2 lbs large shrimp, peeled and deveined
  • 1 tsp seafood seasoning
  • 1 tsp paprika
  • ½ tsp garlic powder
  • ½ tsp onion powder
  • ½ tsp black pepper
  • ¼ tsp cayenne pepper, optional
  • 1 tbsp fresh lemon juice

Butter Sauce

  • 6 tbsp unsalted butter, divided
  • 2 tbsp olive oil
  • 1 medium onion, finely diced
  • 5 cloves garlic, freshly minced
  • ½ tsp crushed red pepper flakes, optional
  • ½ cup dry white wine
  • 1 tsp Worcestershire sauce
  • ½ tsp chicken bouillon powder
  • ¼ tsp freshly grated nutmeg
  • 1 tsp fresh lemon zest
  • Juice of ½ lemon
  • 2 tbsp fresh parsley, chopped
  • 2 tbsp green onions, chopped

For Finishing

  • 1 tbsp cold butter
  • Additional fresh parsley, for garnish
  • Lemon wedges, for serving

Instructions

Step 1: Prepare the Shrimp

Pat the shrimp thoroughly dry with paper towels. Place the shrimp in a large mixing bowl.

Add the seafood seasoning, paprika, garlic powder, onion powder, black pepper, cayenne pepper, and lemon juice.

Toss until every shrimp is evenly coated.

Step 2: Let the Shrimp Rest

Allow the seasoned shrimp to rest for about 10 minutes while you prepare the remaining ingredients.

This short resting time allows the seasoning to penetrate the shrimp without requiring a long marinade.

Step 3: Sear the Shrimp

Heat a large skillet over medium-high heat.

Add the olive oil and 2 tablespoons of butter.

Once hot, carefully add the shrimp in a single layer. Cook for approximately 1½–2 minutes per side, just until the shrimp turn pink and develop a light golden-brown color.

Do not overcrowd the skillet. Cook in batches if necessary.

Remove the shrimp from the skillet and set aside.

Step 4: Build the Butter Sauce

Reduce the heat to medium.

Add the remaining 4 tablespoons of butter to the same skillet.

Add the diced onion and sauté for approximately 3–4 minutes, until softened.

Add the minced garlic and crushed red pepper flakes. Cook for about 30 seconds, stirring constantly so the garlic doesn't burn.

Step 5: Deglaze the Pan

Pour in the ½ cup white wine.

Using a wooden spoon or spatula, scrape the bottom of the skillet to release all those flavorful browned bits left behind by the shrimp.

Allow the wine to simmer for 2–3 minutes, or until reduced by approximately half.

Step 6: Season the Sauce

Stir in the Worcestershire sauce, chicken bouillon, nutmeg, lemon zest, and lemon juice.

Taste the sauce and adjust the seasoning as needed.

The sauce should be buttery, savory, garlicky, slightly tangy, and rich.

Step 7: Return the Shrimp

Return the cooked shrimp and any accumulated juices to the skillet.

Gently toss the shrimp through the sauce and cook for another 1–2 minutes, just until heated through.

Be careful not to overcook the shrimp.

Step 8: Finish with Cold Butter

Turn off the heat.

Add 1 tablespoon of cold butter and gently swirl the skillet until the butter melts into the sauce.

This final step creates a smooth, glossy, restaurant-style butter sauce.

Step 9: Garnish and Serve

Sprinkle the shrimp with fresh parsley and green onions.

Serve immediately with lemon wedges.

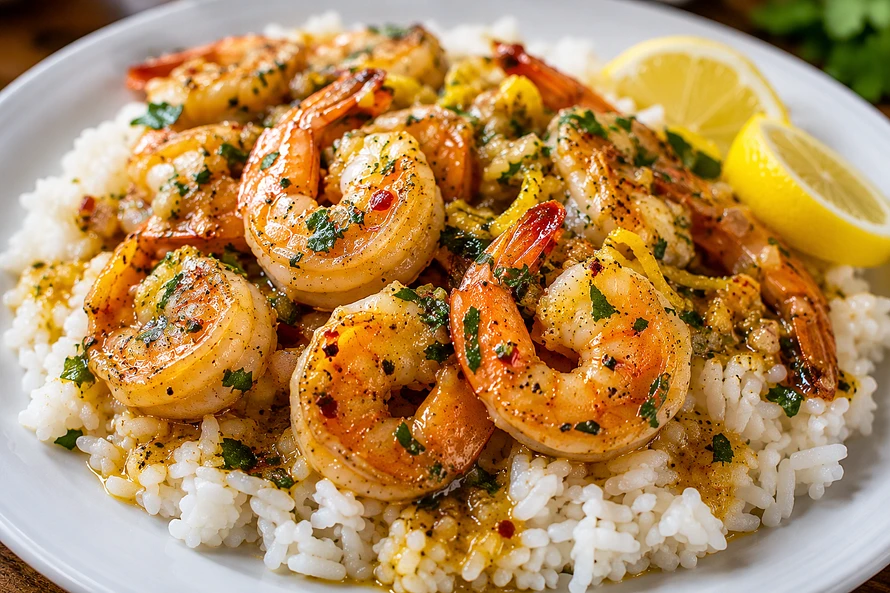
Spoon plenty of the buttery sauce over the shrimp before serving.

Serving Suggestions

Serve your Talk of the Town Butter Shrimp with:

  • Steamed white or jasmine rice
  • Buttered pasta
  • Garlic mashed potatoes
  • Creamy grits
  • Crusty French bread
  • Roasted vegetables
  • Cajun rice
  • Fresh garden salad

Chef's Tips

Pat the shrimp dry before seasoning to get better browning.
Don't overcook the shrimp. They should be just opaque and tender.
Don't rinse the shrimp after seasoning. You want all that flavor to stay on the shrimp.
Deglaze with white wine for a deeper, more complex sauce. Chicken broth can be substituted.
Scrape the bottom of the skillet when adding the wine—the browned bits are packed with flavor.
Add cold butter at the end for an exceptionally silky and glossy sauce.
Fresh lemon juice balances the richness of the butter and keeps the dish from tasting heavy.
✔ For an extra Cajun kick, add ½–1 teaspoon Cajun seasoning to the shrimp seasoning.

⭐ Talk of the Town Secret

Don't waste a drop of that butter sauce! Serve the shrimp over hot rice, pasta, or grits and spoon the extra garlic-butter sauce generously over the top. That's where the talk of the town flavor really happens.

Bold, Smoky, Spicy & Bursting with Authentic Caribbean Flavor!

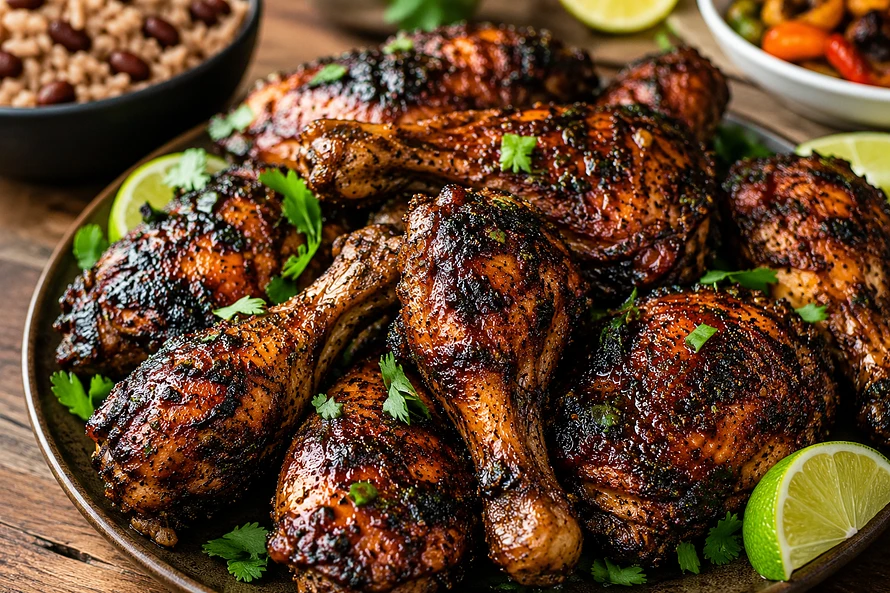
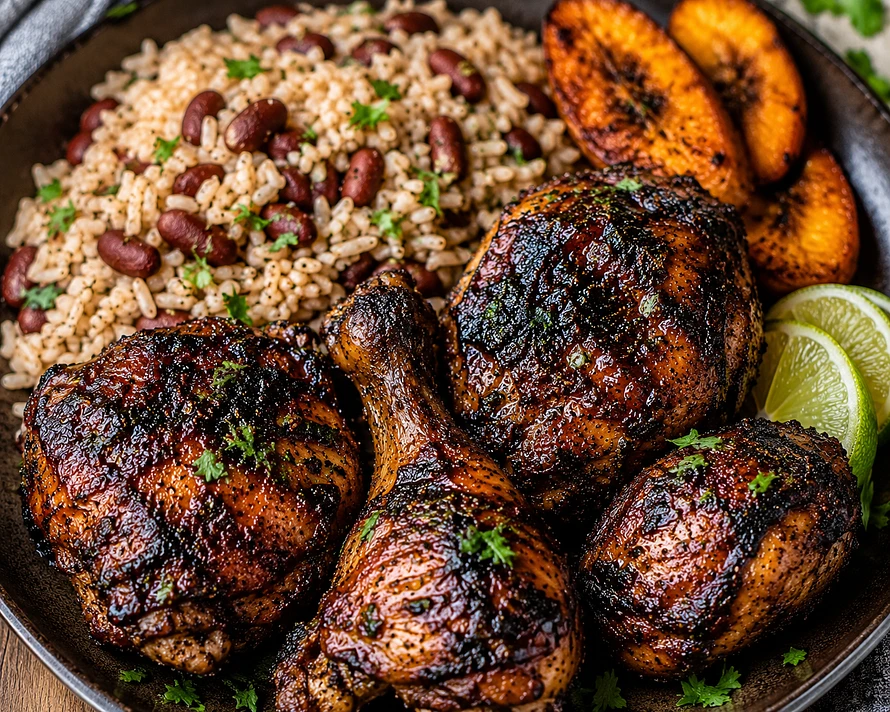
Whether you're preparing a backyard cookout or a comforting family dinner, this Jamaican Jerk Chicken recipe delivers juicy, tender chicken infused with bold Caribbean spices, fresh herbs, fiery peppers, and warm aromatics. A flavorful dry jerk rub followed by a vibrant homemade jerk marinade creates layers of authentic Jamaican flavor, while oven roasting produces beautifully caramelized, slightly charred chicken with irresistible crispy skin.

Recipe Overview

Prep Time: 30 minutes
Marinating Time: 30 minutes to Overnight (recommended)
Cook Time: 50–60 minutes
Total Time: Approximately 2 hours (plus marinating time)
Servings: 6–8

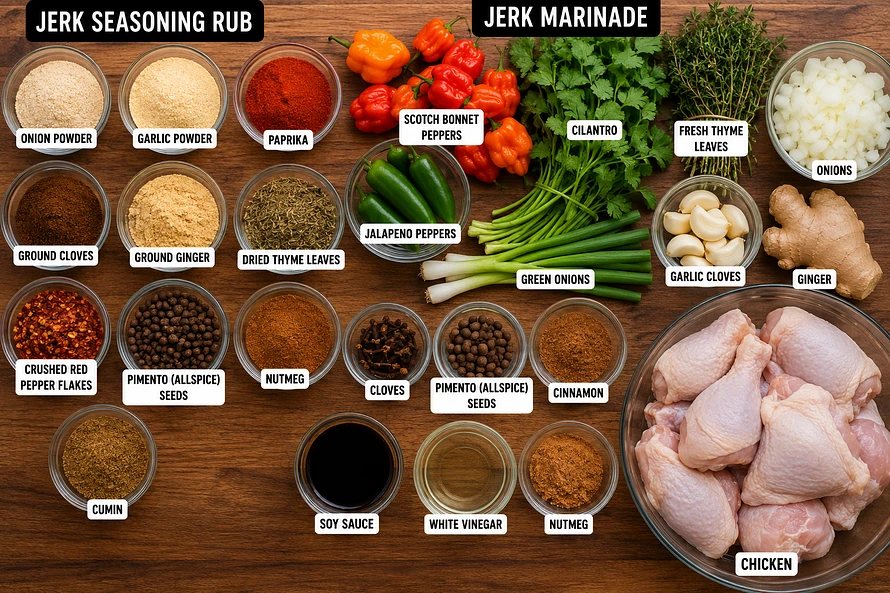
Part 1: Jamaican Jerk Seasoning Rub

Ingredients

  • ½ cup onion powder

  • ½ cup garlic powder

  • ½ cup paprika

  • ¼ cup ground cloves

  • ¼ cup ground ginger

  • ¼ cup dried thyme leaves

  • ¼ cup crushed red pepper flakes

  • ½ cup ground pimento (allspice) (or ¼ cup allspice powder)

  • 2 tablespoons ground nutmeg

  • 2 tablespoons ground cumin

Instructions

Combine all ingredients in a large bowl and whisk until thoroughly blended. Store the seasoning in an airtight container for up to six months.

Part 2: Jamaican Jerk Marinade

Ingredients

  • 8 Scotch bonnet peppers

  • 3 jalapeño peppers

  • 1 bundle fresh cilantro

  • ½ cup fresh thyme leaves

  • 2 medium onions, roughly chopped

  • 4 green onions

  • 8 garlic cloves

  • 3 thumb-sized pieces fresh ginger

  • 5 whole cloves

  • 8 pimento (allspice) seeds

  • 1 tablespoon ground cinnamon

  • ¼ cup ground nutmeg

  • ½ cup soy sauce

  • 1 tablespoon white vinegar

Part 3: Jamaican Jerk Chicken

Ingredients

  • 4–5 pounds chicken (leg quarters, drumsticks, thighs, wings, or a whole chicken cut into serving pieces)

  • 3–4 tablespoons Jamaican Jerk Seasoning Rub

  • Jamaican Jerk Marinade

Instructions

Step 1: Prepare the Marinade

Add the Scotch bonnet peppers, jalapeños, cilantro, fresh thyme, onions, green onions, garlic, ginger, cloves, pimento seeds, cinnamon, nutmeg, soy sauce, and white vinegar to a blender or food processor.

Blend until completely smooth.

Step 2: Prepare the Chicken

Wash the chicken thoroughly and pat it completely dry with paper towels.

Place the chicken into a large mixing bowl.

Step 3: Season

Generously coat every piece of chicken with 3–4 tablespoons of the Jamaican Jerk Seasoning Rub, making sure to season under the skin whenever possible.

Massage the seasoning into the chicken for several minutes until evenly coated.

Step 4: Marinate

Pour the prepared jerk marinade over the seasoned chicken.

Massage the marinade into every piece, ensuring the chicken is completely coated.

Cover the bowl or transfer the chicken to a large zip-top bag.

Refrigerate for 30 minutes, although overnight (8–24 hours) is highly recommended for the deepest flavor.

Remove the chicken from the refrigerator 30 minutes before baking.

Step 5: Bake

Preheat the oven to 400°F (204°C).

Line a baking sheet or roasting pan with foil or parchment paper and lightly grease it with cooking spray or oil. For crispier skin, place the chicken on a wire rack set over the baking pan.

Arrange the chicken skin-side up in a single layer, leaving space between each piece.

Bake for 50–60 minutes, depending on the size of the chicken pieces.

Halfway through cooking, spoon a small amount of the pan juices over the chicken to keep it moist.

Cook until the thickest part reaches an internal temperature of 165°F (74°C).

Step 6: Caramelize

During the final 3–5 minutes, switch the oven to broil to lightly char and caramelize the outside, creating the signature jerk appearance.

Watch carefully to prevent burning.

Step 7: Rest and Serve

Remove the chicken from the oven.

Tent loosely with aluminum foil and allow it to rest for 10 minutes before serving.

Serve with fresh lime wedges and your favorite Jamaican side dishes such as rice and peas, fried plantains, steamed cabbage, or festival.

Chef's Tips

✔ Marinate overnight for the most authentic jerk flavor.

✔ Pat the chicken completely dry before applying the seasoning to help the skin crisp beautifully.

✔ Season underneath the skin whenever possible for maximum flavor.

✔ Bake on a wire rack to allow heat to circulate and produce crispier skin.

✔ Broil only during the final few minutes to achieve the traditional lightly charred jerk finish.

✔ Let the chicken rest for 10 minutes before serving to keep it exceptionally juicy.

✔ For an authentic Jamaican touch, finish the chicken over a hot charcoal grill for 5–10 minutes after baking to add smoky, pimento-style flavor.

Better Than Takeout... Loaded with Flavor in Every Bite!

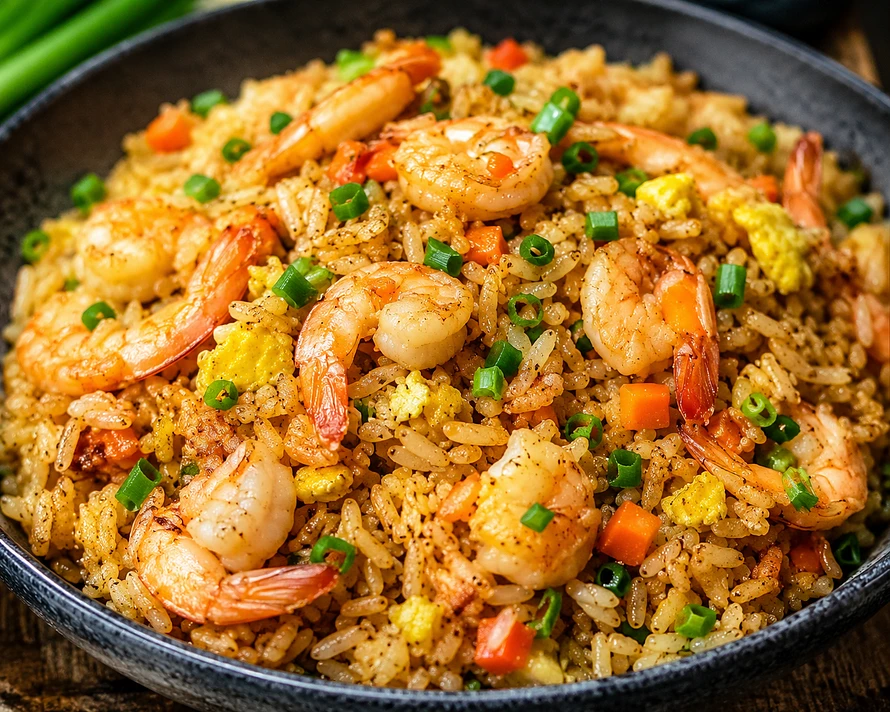
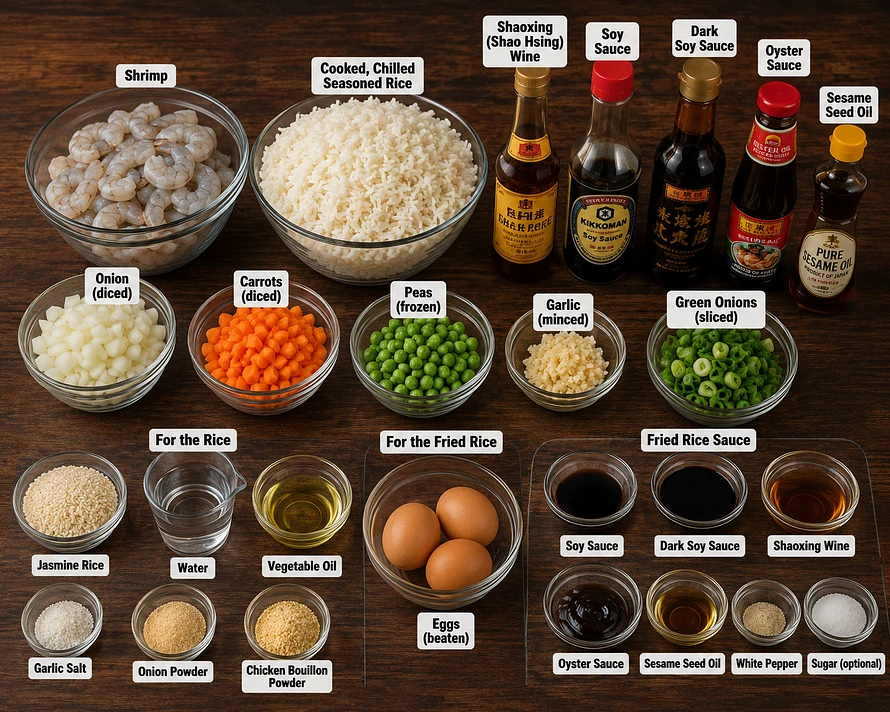
Whether you're preparing a quick weeknight dinner or feeding family and friends, this Easy Shrimp Fried Rice recipe delivers tender, juicy shrimp, perfectly seasoned rice, crisp vegetables, fluffy scrambled eggs, and a rich umami sauce. By seasoning the rice before cooking and finishing everything in a hot wok, you'll achieve restaurant-quality fried rice with incredible flavor and texture.

Recipe Overview

Prep Time: 20 minutes
Rice Chilling Time: 2 hours or overnight (recommended)
Cook Time: 15 minutes
Total Time: Approximately 35 minutes (plus chilling time)
Servings: 4–6

Ingredients

For the Rice

  • 2 cups long-grain jasmine rice
  • 4 cups water
  • 1 tablespoon vegetable oil
  • 1 teaspoon garlic salt
  • 1 teaspoon onion powder
  • 2 teaspoons chicken bouillon powder

For the Fried Rice

  • 1½ lbs large shrimp, peeled and deveined
  • 2 tablespoons vegetable oil
  • 3 large eggs, beaten
  • 1 medium onion, diced
  • 1 cup diced carrots
  • 1 cup frozen peas
  • 4 cloves garlic, minced
  • 4 green onions, sliced
  • 4 cups cooked, chilled seasoned rice

Fried Rice Sauce

  • 3 tablespoons soy sauce
  • 1 tablespoon dark soy sauce
  • 2 tablespoons Shaoxing (Shao Hsing) wine
  • 2 tablespoons oyster sauce
  • 1 teaspoon sesame seed oil
  • ½ teaspoon white pepper
  • ½ teaspoon sugar (optional)

Instructions

Step 1: Cook the Rice

Rinse the jasmine rice under cold water until the water runs clear.

In a medium saucepan, combine the rice, water, vegetable oil, garlic salt, onion powder, and chicken bouillon powder.

Bring to a boil, reduce the heat to low, cover, and cook for about 15–18 minutes or until the rice is tender.

Fluff the rice with a fork and spread it onto a baking sheet to cool completely.

Refrigerate for at least 2 hours or overnight for the best fried rice texture.

Step 2: Prepare the Sauce

In a small bowl, whisk together:

  • Soy sauce
  • Dark soy sauce
  • Shaoxing wine
  • Oyster sauce
  • Sesame seed oil
  • White pepper
  • Sugar (if using)

Set aside.

Step 3: Cook the Shrimp

Heat 1 tablespoon vegetable oil in a large wok or skillet over high heat.

Add the shrimp in a single layer and cook for 1–2 minutes per side until pink and just cooked through.

Transfer the shrimp to a plate.

Step 4: Scramble the Eggs

Reduce the heat slightly.

Add a small drizzle of oil if needed.

Pour in the beaten eggs and gently scramble until just set.

Remove and set aside with the shrimp.

Step 5: Sauté the Vegetables

Add the remaining tablespoon of vegetable oil.

Cook the diced onion and carrots for 3–4 minutes until slightly tender.

Stir in the minced garlic and cook for 30 seconds until fragrant.

Add the peas and cook for another minute.

Step 6: Fry the Rice

Increase the heat to high.

Add the chilled rice to the wok.

Break apart any clumps using your spatula.

Stir-fry for 3–4 minutes until the rice begins to lightly toast.

Pour the prepared sauce evenly over the rice.

Continue tossing until every grain is evenly coated.

Step 7: Finish the Fried Rice

Return the cooked shrimp and scrambled eggs to the wok.

Add the sliced green onions.

Stir everything together for 1–2 minutes until heated through.

Taste and adjust seasoning with additional soy sauce if desired.

Serve immediately while hot.

Chef's Tips

✔ Always use cold, day-old rice for the best texture.
✔ Seasoning the rice while it cooks creates flavor in every bite.
✔ Cook over high heat to develop authentic wok flavor.
✔ Pat the shrimp dry before cooking for a beautiful sear.
✔ Avoid overcrowding the pan to keep the rice from steaming.
✔ Dark soy sauce adds rich color, while regular soy sauce provides the perfect balance of saltiness.
✔ Finish with a small drizzle of sesame oil just before serving for maximum aroma.

Rich, Buttery, and Packed with Louisiana Flavor!

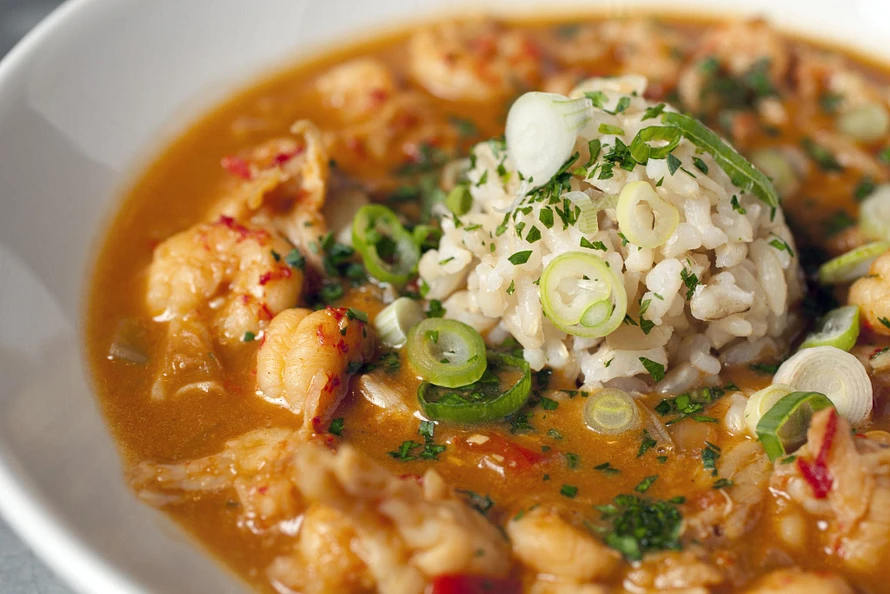
Whether you're preparing a special Southern dinner or craving a true Louisiana classic, this Authentic Cajun Crawfish Étouffée delivers tender crawfish tails simmered in a rich, flavorful roux-based sauce. The traditional Cajun Holy Trinity of onions, bell peppers, and celery creates a deep savory foundation, while fresh green onions, herbs, and a dash of crab boil juice add the perfect Louisiana touch. Served over fluffy white rice, this comforting dish brings restaurant-quality Cajun flavor right to your table.

Recipe Overview

Prep Time: 20 minutes
Cook Time: 45 minutes
Total Time: Approximately 1 hour 5 minutes
Servings: 6

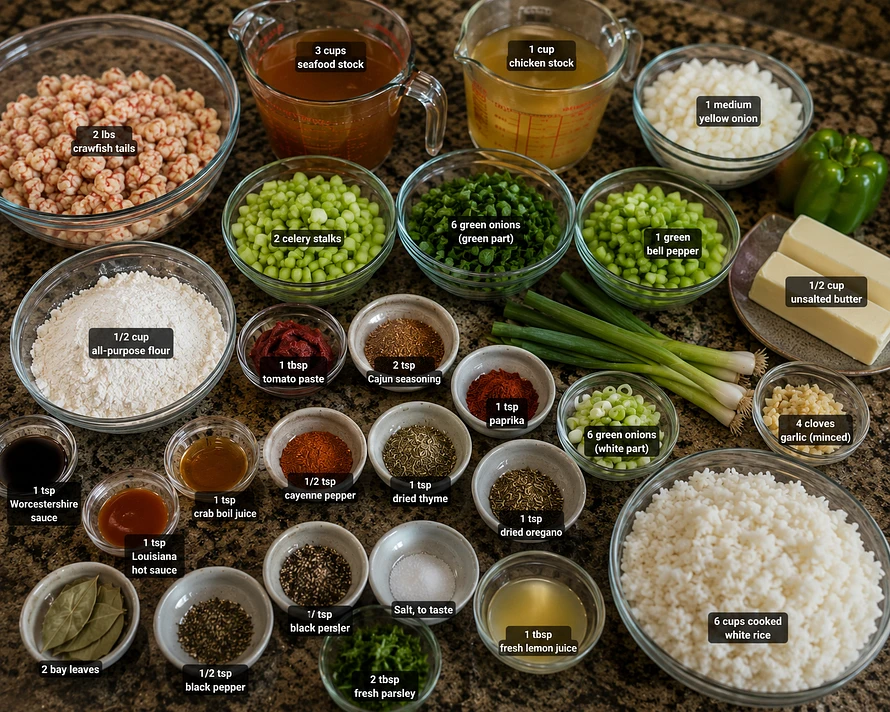
Ingredients

Crawfish Étouffée

  • 2 lbs Louisiana crawfish tails (with crawfish fat, if available)

  • ½ cup unsalted butter

  • ½ cup all-purpose flour

  • 1 medium yellow onion, finely diced

  • 1 green bell pepper, finely diced

  • 2 celery stalks, finely diced

  • 6 green onions, sliced (white and green parts separated)

  • 4 cloves garlic, minced

  • 3 cups seafood stock

  • 1 cup chicken stock

  • 1 tbsp tomato paste

  • 2 tsp Cajun seasoning

  • 1 tsp paprika

  • ½ tsp cayenne pepper (adjust to taste)

  • 1 tsp dried thyme

  • 1 tsp dried oregano

  • 1 tsp Worcestershire sauce

  • 1 tsp Louisiana hot sauce

  • 1 tsp crab boil juice (or a dash, to taste)

  • 2 bay leaves

  • ½ tsp black pepper

  • Salt, to taste

  • 2 tbsp fresh parsley, chopped

  • 1 tbsp fresh lemon juice

  • 1 tbsp cold butter, for finishing (optional)

For Serving

  • 6 cups cooked long-grain white rice

  • Extra chopped green onions, for garnish

  • Fresh parsley, for garnish

  • Warm French bread, optional

----

Instructions

Step 1: Prepare the Holy Trinity

Prepare the Cajun flavor base by finely dicing the onion, green bell pepper, and celery. Slice the green onions, separating the white parts from the green tops. Mince the garlic and set all vegetables aside.

Step 2: Make the Roux

In a large heavy-bottomed pot or Dutch oven, melt the butter over medium heat.

Slowly whisk in the flour and cook, stirring constantly, until the roux develops a smooth, golden-brown color similar to peanut butter, about 12–15 minutes.

Be careful not to burn the roux, as it creates the foundation of the étouffée's flavor.

Step 3: Cook the Vegetables

Add the diced onion, bell pepper, celery, and the white portions of the green onions to the roux.

Cook for 6–8 minutes, stirring frequently, until the vegetables soften and become fragrant.

Add the minced garlic and cook for another 30–60 seconds until aromatic.

Step 4: Build the Étouffée Sauce

Slowly add the seafood stock while stirring constantly to create a smooth sauce.

Add the chicken stock, then stir in:

  • Tomato paste

  • Cajun seasoning

  • Paprika

  • Cayenne pepper

  • Dried thyme

  • Dried oregano

  • Worcestershire sauce

  • Louisiana hot sauce

  • Crab boil juice

  • Bay leaves

  • Black pepper

Bring the sauce to a gentle simmer.

Cook uncovered for 15–20 minutes, stirring occasionally, until the sauce thickens and develops a rich flavor.

Step 5: Add the Crawfish

Gently fold the crawfish tails and crawfish fat into the sauce.

Simmer for 5–7 minutes until the crawfish are warmed through and tender.

Avoid boiling aggressively, as this can make the crawfish tough.

Step 6: Finish the Étouffée

Remove the bay leaves.

Stir in:

  • Green portions of the green onions

  • Fresh parsley

  • Lemon juice

  • Cold butter (optional for a silky finish)

Taste and adjust seasoning with salt, Cajun seasoning, or hot sauce if needed.

Step 7: Serve

Spoon cooked white rice into bowls and generously ladle the crawfish étouffée over the top.

Garnish with fresh chopped green onions and parsley.

Serve with warm French bread to soak up the rich Cajun sauce.

Chef's Tips

✔ Use crawfish fat whenever available for the most authentic Louisiana flavor.
✔ Cook the roux slowly—deep flavor comes from patience.
✔ Add crab boil juice gradually because it is concentrated and can quickly increase salt and spice levels.
✔ Do not overcook the crawfish; gentle simmering keeps them tender and sweet.
✔ For an even richer sauce, finish with cold butter just before serving.
✔ Étouffée tastes even better the next day after the flavors have blended together.

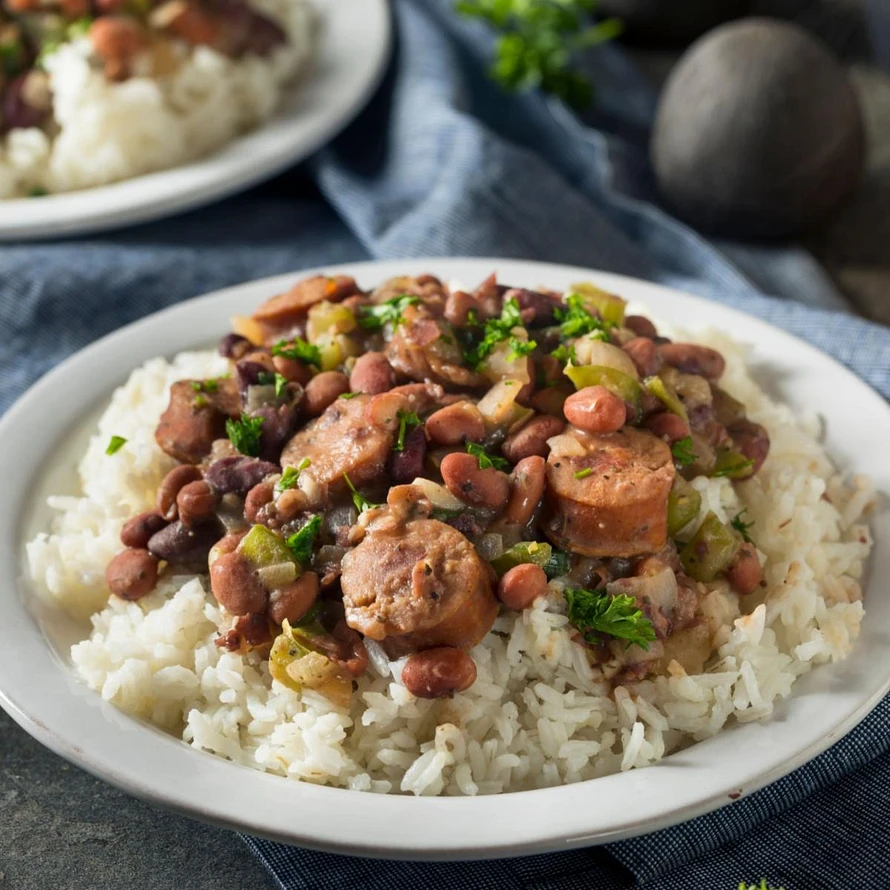
A Louisiana Classic That's Rich, Creamy, and Packed with Flavor!

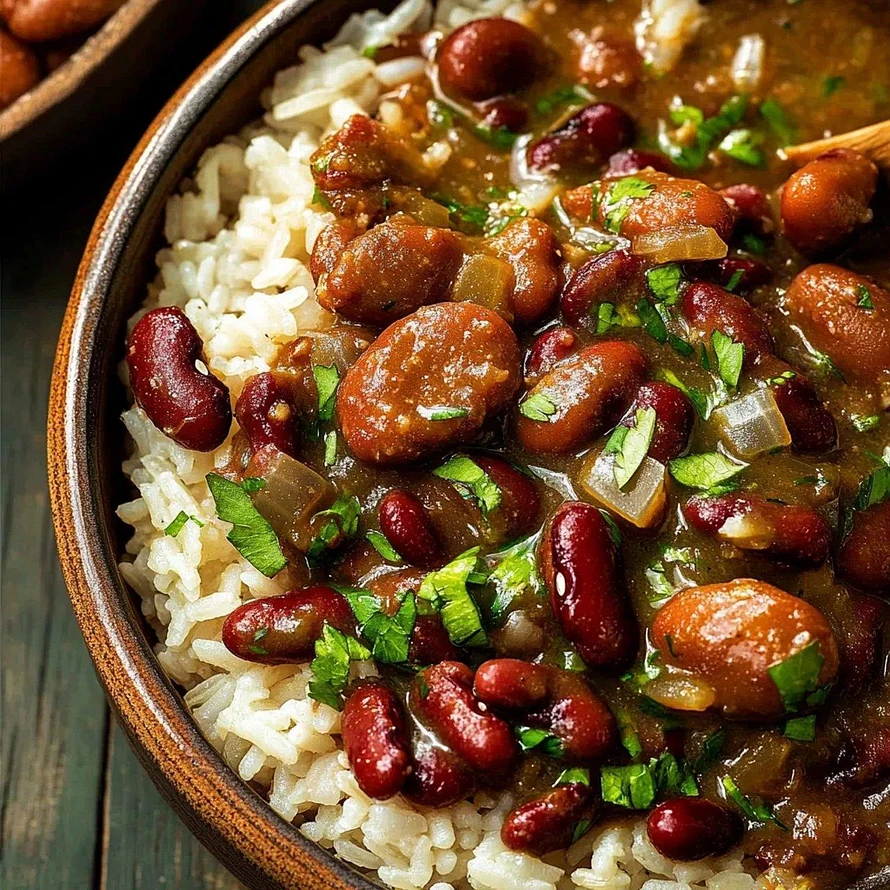
Nothing says Southern comfort quite like a steaming pot of Easy Cajun Red Beans with Ham Hocks and Smoked Sausage. Slow-simmered until the beans become perfectly creamy, this hearty dish combines smoky ham hocks, savory smoked sausage, and the Cajun "Holy Trinity" of onions, bell peppers, and celery. Finished with a splash of liquid crab boil and Louisiana-style hot sauce, every bite delivers authentic Louisiana flavor that's even better the next day. Whether you're feeding the family or meal-prepping for the week, this one-pot classic is guaranteed to satisfy.

Recipe Overview

Prep Time: 15 minutes (plus optional overnight soaking)
Cook Time: 2½–3½ hours
Total Time: Approximately 3–4 hours
Servings: 6–8

Ingredients

  • 1 lb dried red beans, rinsed and sorted
  • 1–2 smoked ham hocks
  • 12–14 oz smoked sausage, sliced
  • 1 large onion, diced
  • 1 green bell pepper, diced
  • 2 celery stalks, diced
  • 4–5 cloves garlic, minced
  • 2–3 bay leaves
  • 1–2 tsp Cajun seasoning
  • 1 tsp smoked paprika
  • 6–8 cups chicken stock (or water)
  • Salt and freshly ground black pepper, to taste
  • 1 tsp liquid crab boil
  • 1 tsp Louisiana-style hot sauce
  • Cooked white rice, for serving
  • Chopped green onions or fresh parsley, for garnish (optional)

----

Instructions

Step 1: Prepare the Beans

Rinse the dried red beans thoroughly and remove any damaged beans or debris.

For a shorter cooking time, soak the beans overnight in cold water. Drain and rinse before cooking. If you're short on time, you can cook them without soaking; they'll simply require a little longer to become tender.

Step 2: Brown the Sausage

Heat a large Dutch oven or heavy-bottomed stockpot over medium heat.

Add the sliced smoked sausage and cook for 5–7 minutes until browned on both sides.

Remove the sausage and set aside, leaving the flavorful drippings in the pot.

Step 3: Cook the Holy Trinity

Add the diced onion, green bell pepper, and celery to the pot.

Cook for about 5–7 minutes until the vegetables become soft and translucent.

Stir in the minced garlic and cook for another minute until fragrant.

Step 4: Build the Pot

Add to the pot:

  • Red beans
  • Smoked ham hocks
  • Bay leaves
  • Cajun seasoning
  • Smoked paprika

Pour in the chicken stock until everything is covered by about 1–2 inches of liquid.

Bring to a gentle boil.

Reduce the heat to low and simmer uncovered or partially covered.

Step 5: Slow Simmer

Cook for 2½–3½ hours, stirring every 20–30 minutes to prevent sticking.

As the beans soften, use the back of a wooden spoon to mash some of them against the side of the pot. This naturally thickens the broth and creates the signature creamy texture without adding flour or cream.

Step 6: Finish the Red Beans

Once the beans are tender:

  • Return the browned smoked sausage to the pot.
  • Continue simmering for 20–30 minutes.
  • Remove the ham hocks and allow them to cool slightly.
  • Pull the tender meat from the bones, discard the skin and bones, then stir the shredded meat back into the beans.

During the final 5 minutes of cooking, stir in:

  • 1 teaspoon liquid crab boil
  • 1 teaspoon Louisiana-style hot sauce

Taste and adjust the seasoning with salt, black pepper, additional Cajun seasoning, or extra hot sauce if desired.

Step 7: Serve

Spoon the creamy red beans over hot steamed white rice.

Garnish with chopped green onions or fresh parsley and serve with warm cornbread or crusty French bread for an authentic Louisiana meal.

Chef's Tips

✔ Soak the beans overnight for faster cooking and an even creamier texture.
✔ Browning the smoked sausage first creates a richer, deeper flavor throughout the dish.
✔ Mash a portion of the beans near the end of cooking to naturally thicken the broth.
✔ Add the liquid crab boil and Louisiana hot sauce during the last few minutes to preserve their bold Cajun flavor.
✔ Like many Louisiana classics, these red beans taste even better the next day after the flavors have had time to meld.
✔ Freeze leftovers for up to 3 months for a quick, hearty meal anytime.

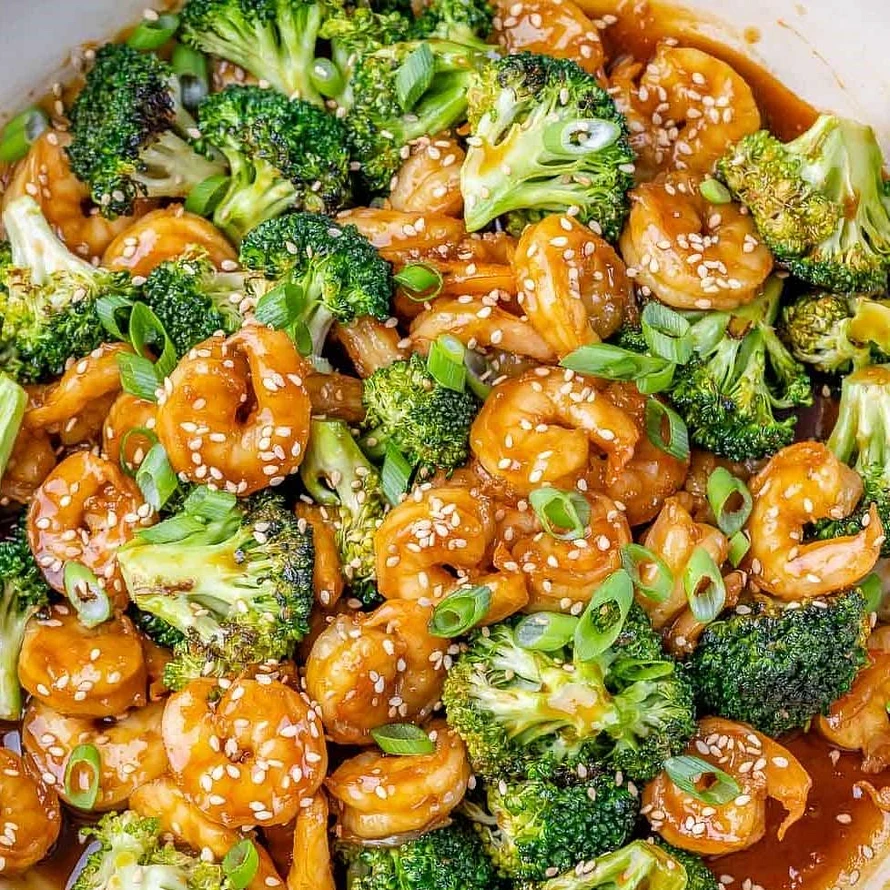
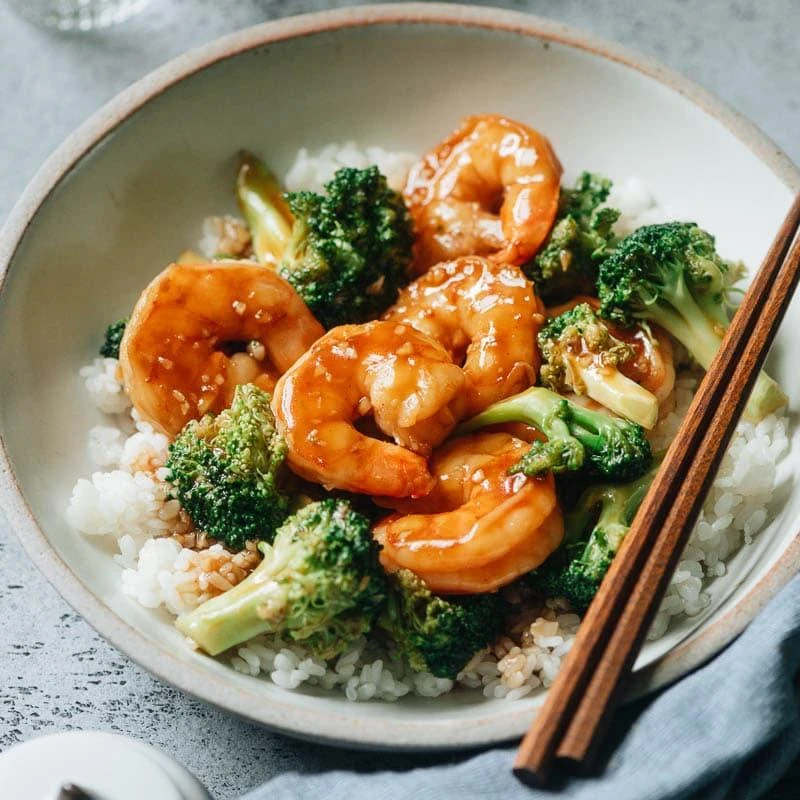
Tender, Juicy Shrimp with Crisp Broccoli in a Silky Garlic Sauce!

Whether you're preparing a quick weeknight dinner or recreating your favorite Chinese takeout at home, this Restaurant-Style Shrimp with Broccoli recipe delivers plump, juicy shrimp with a tender-crisp texture using professional brining and velveting techniques. A short brine with cornstarch and baking soda locks in moisture, while the velveting process creates the signature silky texture found in authentic Chinese restaurants. Finished with fresh broccoli and a savory garlic oyster sauce, this dish is flavorful, elegant, and easy to prepare.

Recipe Overview

Prep Time: 25 minutes
Brining Time: 5 minutes
Velveting Time: 15 minutes
Cook Time: 12–15 minutes
Total Time: Approximately 55–60 minutes
Servings: 4

Ingredients

Shrimp Brine

  • 2 lbs large shrimp (21–25 count), peeled and deveined
  • 4 cups cold water
  • ¼ cup kosher salt
  • 1 tsp baking soda
  • 1 tbsp cornstarch
  • Ice cubes

Shrimp Velveting Mixture

  • 1 egg white
  • 1 tbsp cornstarch
  • 1 tsp baking soda
  • 1 tsp Shaoxing cooking wine (optional)
  • 1 tsp sesame oil
  • ½ tsp white pepper

Broccoli

  • 2 large broccoli crowns, cut into florets
  • 2 quarts water
  • 1 tsp salt
  • 1 tbsp vegetable oil

Stir-Fry Sauce

  • 1½ cups low-sodium chicken broth
  • 2 tbsp oyster sauce
  • 2 tbsp light soy sauce
  • 1 tbsp dark soy sauce
  • 1 tbsp hoisin sauce
  • 2 tsp sugar
  • 1 tsp chicken bouillon powder
  • 1 tsp sesame oil
  • ½ tsp white pepper

Cornstarch Slurry

  • 1 tbsp cornstarch
  • 2 tbsp cold water

Aromatics

  • 2 tbsp vegetable oil
  • 5 cloves garlic, minced
  • 1 tbsp fresh ginger, minced
  • 3 green onions, sliced (white and green parts separated)

----

Instructions

Step 1: Prepare the Shrimp Brine

In a large mixing bowl, combine:

  • Cold water
  • Kosher salt
  • Baking soda
  • Cornstarch

Whisk until the salt and cornstarch are completely dissolved.

Add the shrimp and allow them to soak for 5 minutes.

The salt seasons the shrimp, the baking soda improves texture by creating a firmer, springier bite, and the cornstarch forms a light coating that helps retain moisture during cooking.

Drain the shrimp thoroughly.

Rinse quickly under cold water and pat completely dry with paper towels.

Step 2: Velvet the Shrimp

In a clean bowl, combine:

  • Egg white
  • Cornstarch
  • Baking soda
  • Shaoxing cooking wine
  • Sesame oil
  • White pepper

Mix until smooth.

Add the shrimp and gently toss until every piece is evenly coated.

Cover and refrigerate for 15 minutes.

This velveting process creates a silky coating that protects the shrimp and prevents overcooking.

Step 3: Prepare the Broccoli

Bring a large pot of water to a boil.

Add:

  • Salt
  • Vegetable oil

Add the broccoli florets and blanch for 1½–2 minutes until bright green and slightly tender.

Immediately transfer the broccoli to ice water to stop the cooking process.

Drain well and set aside.

Step 4: Prepare the Sauce

In a bowl, combine:

  • Chicken broth
  • Oyster sauce
  • Light soy sauce
  • Dark soy sauce
  • Hoisin sauce
  • Sugar
  • Chicken bouillon powder
  • Sesame oil
  • White pepper

Stir well and set aside.

Mix the cornstarch and cold water together to create the slurry.

Step 5: Cook the Velveted Shrimp

Heat a pot of water to approximately 170–180°F (77–82°C). The water should be hot but not boiling.

Add the shrimp and gently cook for 45–60 seconds, just until the shrimp begin turning pink.

Remove with a slotted spoon and drain.

Do not fully cook the shrimp at this stage, as they will finish cooking in the sauce.

Step 6: Stir-Fry the Aromatics

Heat a wok or large skillet over high heat.

Add the vegetable oil.

Add:

  • Garlic
  • Ginger
  • White parts of green onions

Stir-fry for about 30 seconds until fragrant.

Step 7: Finish the Shrimp and Broccoli

Pour the prepared sauce into the wok.

Bring to a gentle simmer.

Stir the cornstarch slurry and slowly add it to the sauce while stirring until thickened.

Add the broccoli and toss to coat.

Add the velveted shrimp and cook for 1–2 minutes until heated through.

Finish with:

  • Green onion tops
  • Additional sesame oil (optional)

Step 8: Rest and Serve

Remove from heat and allow the dish to rest for a few minutes before serving.

Serve hot over:

  • Steamed jasmine rice
  • Fried rice
  • Garlic noodles
  • Brown rice

Garnish with sesame seeds or sliced green onions if desired.

Chef's Tips

✔ Brining for only 5 minutes keeps shrimp perfectly seasoned without making them too salty.
✔ The combination of baking soda and cornstarch creates a plump, restaurant-quality shrimp texture.
✔ Pat shrimp completely dry before velveting for the best coating.
✔ Do not boil the shrimp during the velveting step; gentle heat keeps them tender.
✔ Blanch broccoli first to maintain its bright color and crisp texture.
✔ Avoid overcooking shrimp—cook just until they turn pink and opaque.
✔ Prepare all ingredients before stir-frying because the final cooking process moves quickly.